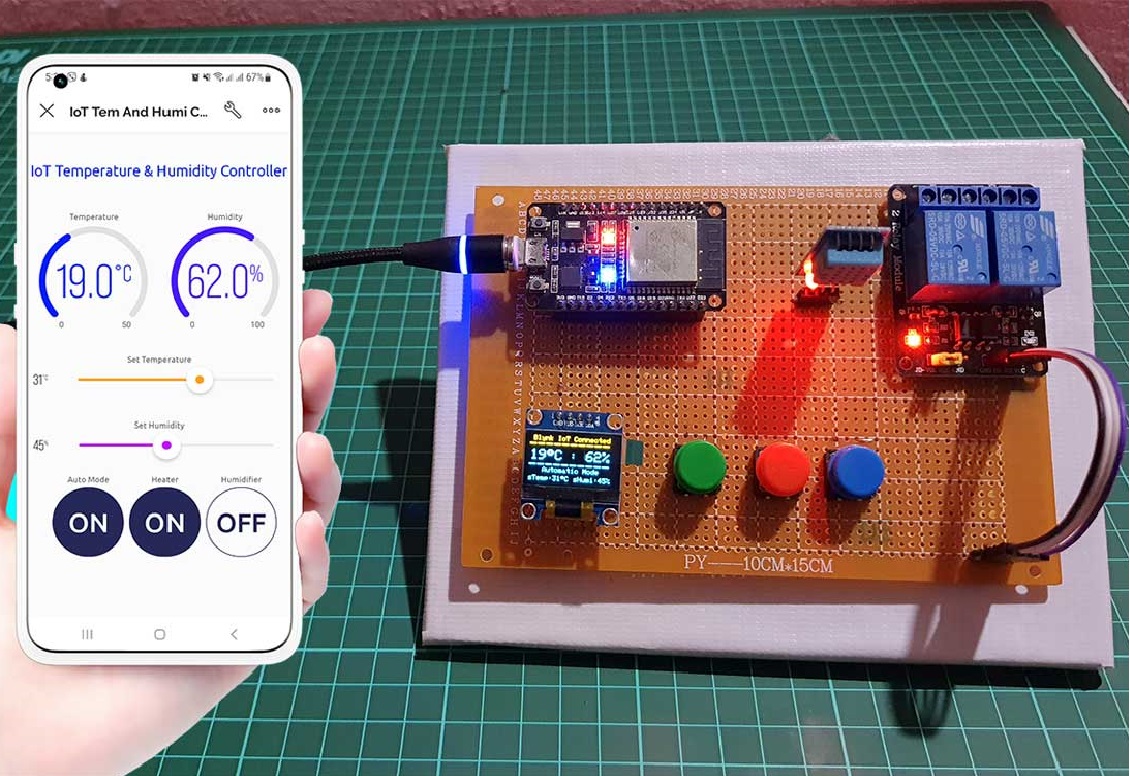
IoT Temperature and Humidity Monitor
Introduction
Create a basic IoT system that measures temperature and humidity and sends the data to a cloud platform for remote monitoring.
Components
Before you start building your Arduino-based drone, make sure you have the following components:
Arduino board (e.g., Arduino Uno or Arduino Nano)
DHT22 or DHT11 sensor for temperature and humidity
Wi-Fi module (e.g., ESP8266 or ESP32)
Breadboard and jumper wires
Internet connection
Project Steps
1. Sensor Connections:
- Connect the DHT22/DHT11 sensor to the Arduino for temperature and humidity readings.
2. Arduino Programming:
- Write Arduino code to read data from the DHT sensor.
- Set up Wi-Fi connectivity using the Wi-Fi module.
3. Data Transmission:
- Create a JSON format for the sensor data.
- Send this data to a cloud platform or web server.
4. Cloud Platform:
- Use a cloud service like ThingSpeak, Adafruit IO, or a custom server to receive and store data.
5. Web Dashboard:
- Create a simple web dashboard to visualize temperature and humidity data.
- Display the data in real-time using charts or graphs.
6. Remote Access:
- Ensure the dashboard is accessible from anywhere with an internet connection.
- Users can monitor temperature and humidity remotely.
This project introduces students to Arduino programming, sensor integration, Wi-Fi communication, and cloud-based data storage. It's a straightforward way to get started with IoT and remote monitoring.
Circuit Connections:
1. Connect the DHT Sensor:
- Connect the VCC pin of the DHT sensor to 5V on the Arduino.
- Connect the GND pin of the DHT sensor to GND on the Arduino.
- Connect the Data pin of the DHT sensor to a digital pin on the Arduino (e.g., D2).
2. Connect the ESP8266 Wi-Fi Module:
- Connect the VCC (3.3V) pin of the ESP8266 module to 3.3V on the Arduino.
- Connect the GND pin of the ESP8266 module to GND on the Arduino.
- Connect the TX (transmit) pin of the ESP8266 module to a digital pin on the Arduino (e.g.,D10).
- Connect the RX (receive) pin of the ESP8266 module to a digital pin on the Arduino (e.g.,D11).
3. Power Supply:
- Power the Arduino with a USB cable or an external power source.
Note:
- Make sure to connect the components as described above and use the correct pins on the Arduino. Double-check the pinout of your specific DHT sensor and ESP8266 module if they differ.
- Additionally, you may need to install the necessary libraries and write the Arduino code to read data from the DHT sensor, transmit it via the ESP8266 module, and send it to a cloud platform or web server. The specifics of the code may vary depending on your chosen cloud platform and programming preferences.
Code
#include
#include
#include
#include
// Define the DHT sensor and pin
#define DHTPIN 2 // Digital pin connected to the DHT sensor
#define DHTTYPE DHT22 // Change to DHT11 if you're using that sensor
// Replace with your network credentials
const char* ssid = "YourSSID";
const char* password = "YourPassword";
// Replace with your ThingSpeak channel details
char* thingSpeakApiKey = "YourAPIKey";
const char* server = "api.thingspeak.com";
const char* apiPath = "/update";
DHT dht(DHTPIN, DHTTYPE);
void setup() {
Serial.begin(115200);
delay(10);
// Connect to Wi-Fi
WiFi.begin(ssid, password);
while (WiFi.status() != WL_CONNECTED) {
Serial.println("Connecting to WiFi...");
}
Serial.println("Connected to WiFi");
dht.begin();
}
void loop() {
float humidity = dht.readHumidity();
float temperature = dht.readTemperature();
if (isnan(humidity) || isnan(temperature)) {
Serial.println("Failed to read from DHT sensor!");
return;
}
Serial.print("Temperature: ");
Serial.print(temperature);
Serial.print(" °C\t");
Serial.print("Humidity: ");
Serial.print(humidity);
Serial.println(" %");
// Send data to ThingSpeak
WiFiClient client;
if (client.connect(server, 80)) {
String postStr = String("api_key=") + thingSpeakApiKe
y;postStr += "&field1=" + String(temperature);
postStr += "&field2=" + String(humidity);
postStr += "\r\n\r\n";
client.print("POST " + String(apiPath) + " HTTP/1.1\r\n");
client.print("Host: " + String(server) + "\r\n");
client.print("Content-Type: application/x-www-form-urlencoded\r\n");
client.print("Content-Length: " + String(postStr.length()) + "\r\n\r\n");
client.print(postStr);
Serial.println("Data sent to ThingSpeak");
}
client.stop();
// Update every 15 minutes (adjust as needed)
delay(900000);
}
Before uploading this code to your Arduino board, make sure to:
1. Replace `"YourSSID"` and `"YourPassword"` with your Wi-Fi network credentials.
2. Replace `"YourAPIKey"` with your ThingSpeak API key.
3. Install the required libraries (DHT sensor library, ESP8266WiFi library, and ThingSpeak library) through the Arduino IDE's Library Manager.
Once uploaded, your Arduino will read temperature and humidity data from the DHT sensor, send it to ThingSpeak, and repeat the process every 15 minutes (adjust the delay as needed).You can then create charts or visualize this data on your ThingSpeak channel's dashboard.