
Interface OV7670 Camera module with Arduino
Introduction
In this project, we'll discover how to connect an OV7670 Camera module to an Arduino Nano Board. We'll learn how to stream and save live pictures to a computer. While there are some complex tutorials online, I've simplified the process to make it easy. With our method, you can view pictures in the Arduino software and effortlessly save them on your computer.

Components and Supplies
Before you start building your Arduino-based drone, make sure you have the following components and supplies:
Arduino Uno
OV7670 Camera Module
Bread Board
Jumper Wire (M to F)
Resistor
-> 2x 10K ohm Resistor
-> 1x 1K ohm Resistor
-> 1x 680 ohm Resistor
OV7670 Camera Image streaming Tool for Arduino
Once you have all the parts you need, the first step is to add a special tool to the Arduino IDE. This tool helps you see pictures from the OV7670 Camera module. It's called "ArduImageCapture."
To get this tool function as we require, follow these steps:
1. Go to this link to download ArduImageCapture: https://circuitjournal.com/download?file=ArduImageCapture.1.1.zip
2. After downloading, unzip the file.
3. Copy the "ArduImageCapture" folder you just unzipped and paste it into your Arduino "tools" folder. If you don't have a "tools" folder, you can create one yourself.
This tool will make it easier for you to work with the OV7670 Camera module in your Arduino projects.
On Windows:
C:\Users\

Once you've copied the folder as we demonstrated, go ahead and launch the Arduino IDE.
Next, open the "tools" tab. If everything is set up correctly, you should find an option named "ArduImageCapture" there.
This means you've successfully added the image streaming tool to Arduino.
Now, you can proceed to upload the code to your Arduino Nano.
Arduino Code
You can download the Arduino Code from the GITHUB by using link below
(If require Upload the folder to git-hub and replace link given above)
Extract the downloaded ZIP file.
Copy the two libraries “LiveOV7670Library” and “Adafruit_GFX_Library” from “src/lib” to your Arduino “libraries” folder.
On Windows:
C:\Users\
If you see "Adafruit_GFX_Library" in the library folder, you don't have to copy it again. You can replace it if necessary. Now, let's proceed to upload the code to the Arduino Nano. Open the Arduino software (IDE) and open the Arduino code file called "LiveOV7670.ino."
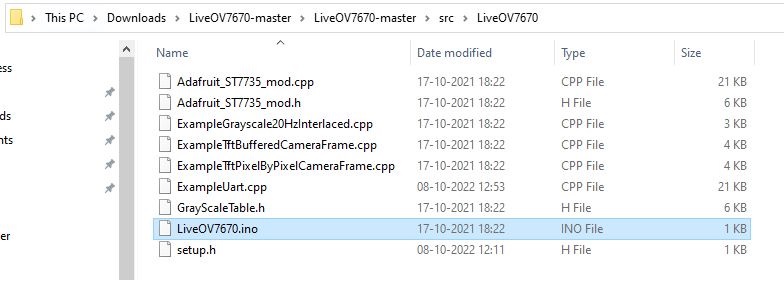
C:\Download\LiveOV7670-master\LiveOV7670-master\src\LiveOV7670
After opening this LiveOV7670.ino file in Arduino IDE go to the setup.h file tab and change the EXAMPLE definition as below
#define EXAMPLE 3
Once you've finished making the changes mentioned above, it's time to put your code onto the Arduino. But before we connect the wires, let's make sure that everything we've done up to this point is correct. To do that, connect your Arduino to your computer, select the right port and device, and then open ArduImageCapture from the Tools menu in the Arduino IDE.
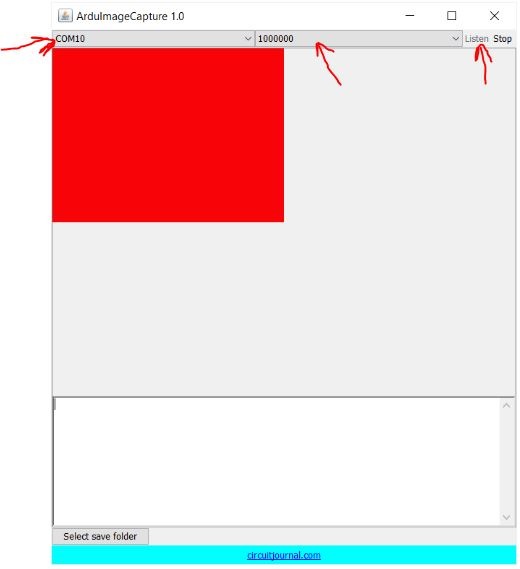
When you have this window open, change the rate to 1000000 and click on the "listen" button. If everything is right, you will see a red image, which means our code is working well with the ArduImageCapture tool. If you encounter any issues getting this red screen, in those situations, choose the "ExampleUart.cpp" tab and modify the definition to:
#define UART_MODE 9
Upload your code to the Arduino board once more and test it. If everything's working well now, it's time to connect the wires.
Wiring Diagram
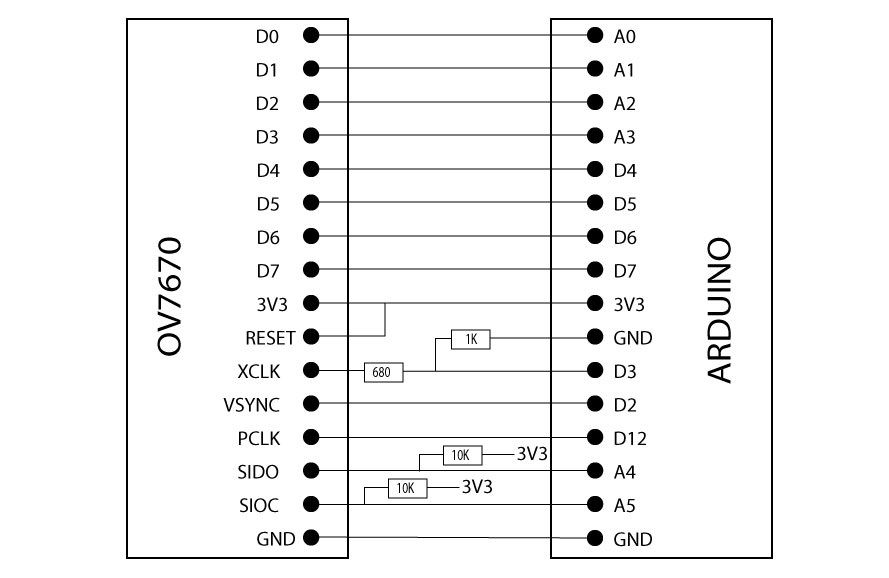
Please do the wiring as shown in the diagram above.
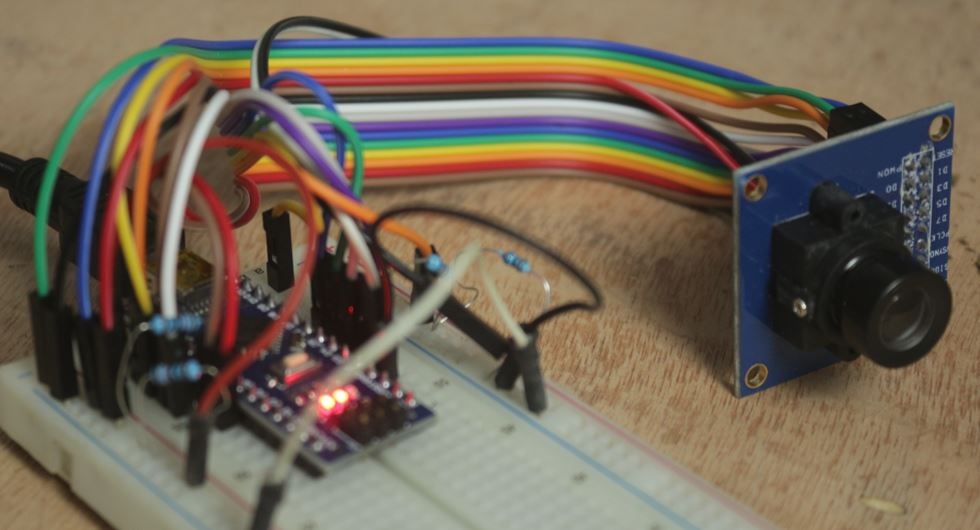
Once you've finished connecting the wires and linking the Arduino to your computer, you'll want to open the Arduino IDE. Make sure to choose the correct port and device in the Arduino IDE settings. Next, open the ArduImageCapture tool and set the rate to 1000000. Then, simply click on "listen." If everything is set up correctly, you should see the image appear on your screen.
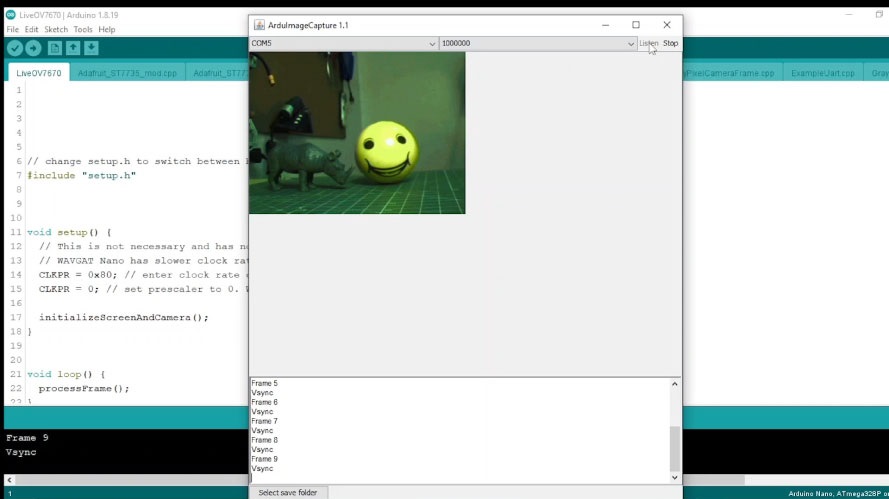
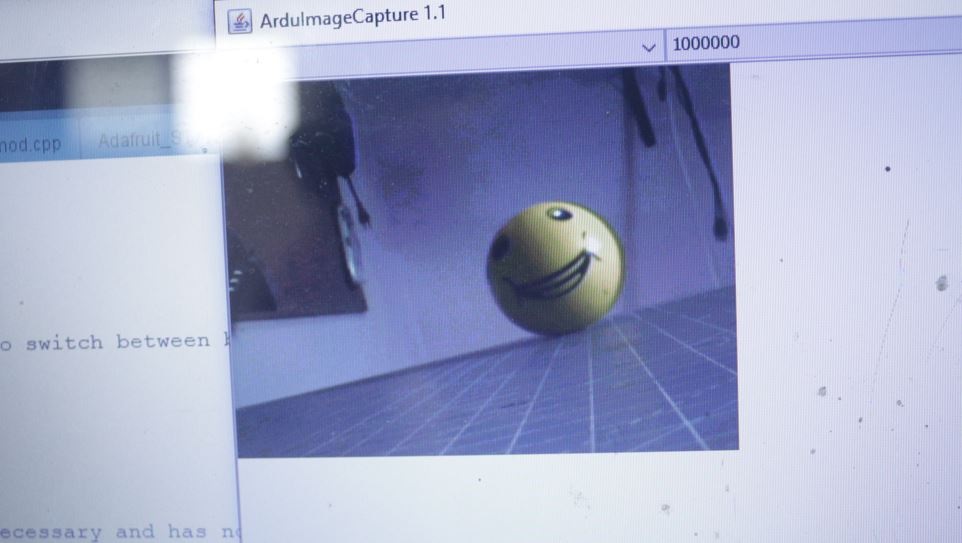

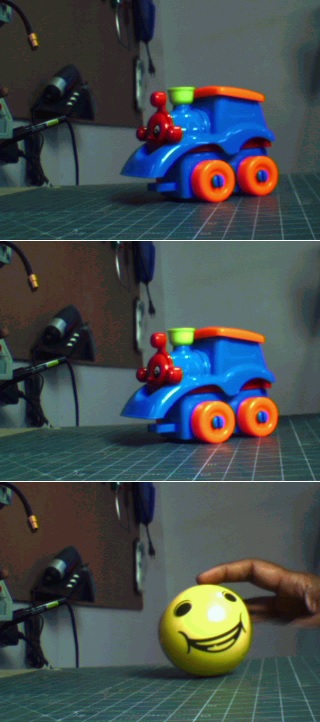
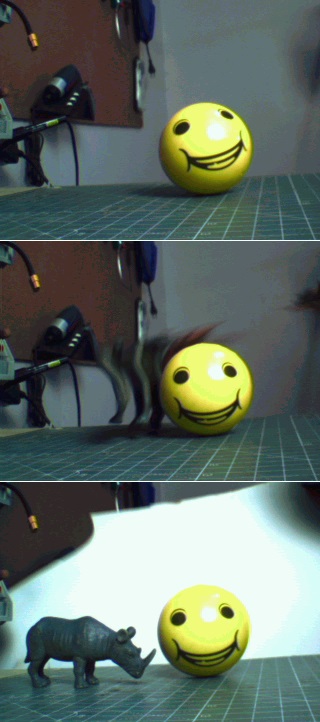
Image samples
How to save image in folder
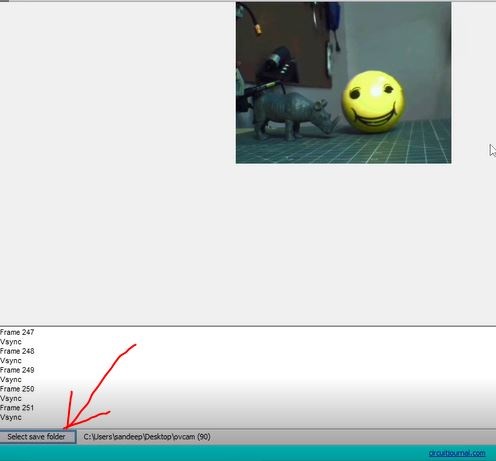
To keep the pictures on your computer, just click the "Select save folder" option that's highlighted in red in the picture. Then, choose the folder where you want to store the image.